
|
|
In Houston, we always had slab foundations, but in HSV, most houses are built on the sides of hills, so they have pier-and-truss (or pier-and-beam) foundations. I would guess that fewer than 10% of houses in HSV are built on slabs. |
It is hard to find any advantage of slabs over pier-and-beam, other than a slab being cheaper and easier to build on a flat lot. It also may be necessary if ground water is a problem, which is rarely the case in HSV. Thermal conduction through the concrete can be a problem with slabs, although it is possible to insulate slabs.
The advantages of pier-and-beam on a typical, sloping HSV lot are
|
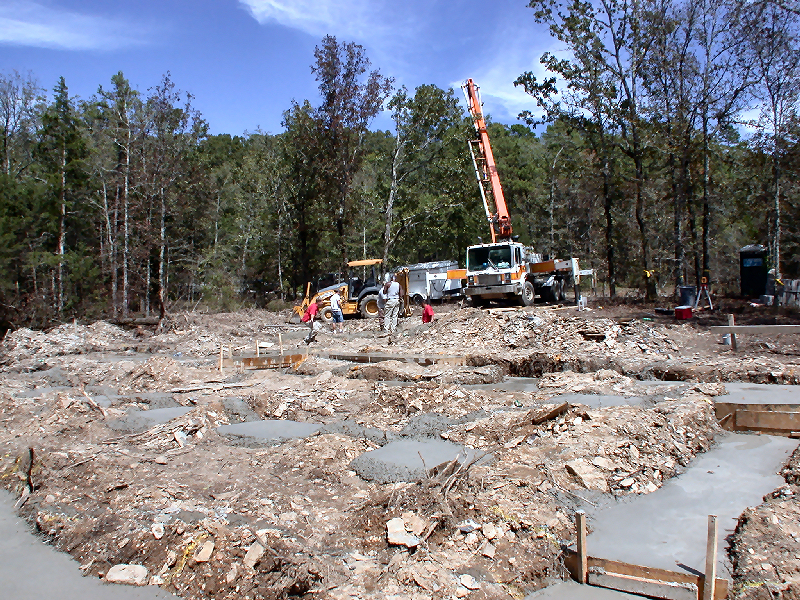
After the surveyor has laid out the boundaries of the lot and the construction area has been cleared of trees and brush and leveled, the next step is to pour the concrete footers. These are holes and trenches which are dug and filled with concrete to provide support for the slab or piers and foundation walls.
Before digging the holes and trenches, the floor plan is laid out on the ground with paint or chalk so that the workers know where to dig. If a plan is very basic, such as just a rectangle, this step may not be needed. After the footings have cured, which takes 3-7 days, foundation walls of cement blocks are normally erected. |
|
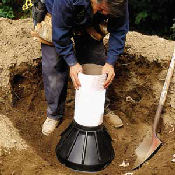
See this article at ThisOldHouse.com for information about using a form to pour the footing and beam in one shot and saving the 3-day wait for the footing to cure. The forms are available from www.BigFootSystems.com
ThisOldHouse also recommends pouring concrete foundation walls instead of using cement blocks. |
|
If your garage is on a slope, the choices are to put up the foundation
walls for the garage and fill them in with dirt and pour the slab on top
of that, or put in a suspended slab. The former method is probably
cheaper and easier, and that is what was done at our house. At Judy's house, her back patio is 4' off the ground, and we also used a slab on cinder-block foundation filled in with dirt.
The fill-in dirt must be thoroughly compacted; otherwise, it will settle over time and your slab will settle with it. On mountain-view lots built on extreme slopes, the builder may have no choice but to use a suspended slab. Either way, if you work on your car a lot, you might want to have the builder leave a hole in the floor where you can stand up under the car to work on it. |
Piers go up next. Our den is 18'x20' and we were putting a heavy pool table in the middle, so we got the builder to put additional piers in that area to provide additional support. We did not get extra support for an equally heavy dining room table because it was going to be closer to a wall in a narrower room, and thus would get sufficient support from the regular piers.
We put a drain at the lowest point under the house so that any water that might get under the house would have a way out. We were concerned that otherwise, if any water got under the house, such as from a leak (or worse) in a pipe or the water heater, the cement block walls would hold it in indefinitely. The drain pipe was cheap enough to do and now we don't have to worry about flooding.
Judy's builder put a drain pipe around her foundation and painted the foundation (cement block) walls with waterproof paint to keep ground water from getting inside after dirt was filled in outside the foundation walls. Vinyl enamel, which is often used on swimming pools, is excellent for that purpose.

|
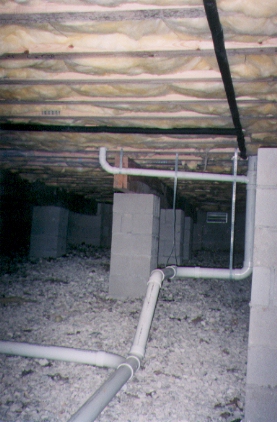
The final part of the foundation is putting the floor trusses across the piers and putting subflooring (plywood) on top of that. A cheaper (and weaker) alternative to trusses is to use 2"x12" wooden beams. Craft uses trusses. (The vertical studs seen in this picture are not part of the support system. They are framing for the wall of the storage room.) |
The ground under the house is covered with a 6 mil vapor barrier. Most builders use polyethylene sheeting, but the inexpensive variety is made with low-density polyethlene resins. It may have pinholes in the material and may degrade or break down in contact with alkaline soils.
High-performance polyethelene vapor barrier is made using virgin (as opposed to recycled) high-density polyethylene with two or more sheets cross-laminated at 90-degrees and fused with a hot-melt resin. While this material is more expensive, the total cost is minimal anyway and it is often 50 times better at resisting water vapor transmission.
However, it will do no good to pay for the higher quality polyethelene if it is not installed properly. Vapor barrier must be sealed to the foundation walls to prevent vapor from coming around the edges, and we doubt that many builders do this. Likewise, overlapping borders between sheets must be sealed. An inadequate vapor barrier may lead to a dangerous and expensive-to-fix mold problem.
And note that if the crawl space is properly sealed, the last thing you want to do is put vents in the foundation walls which let in moist air! Yet, again, this is something which most builders do. [Actually, you will get a lot of debate about which is better -- having vents which can let the crawl space air out, or not having vents which let in moist air. In Arkansas, vents are required by the state if the crawl space is to be treated for termites, which it must be. We think this is misguided.]
|
Most builders cover the vapor barrier with gravel to protect the barrier from getting torn up by workers walking on it. (The rental house we lived in for 8 months, built by Cooper, did not have the gravel.)
Batt insulation is put between the trusses. As you can see in the picture, the advantage of crawl space instead of a slab is that you can easily (depending on the slope of the lot) work on plumbing and electrical lines. |
|
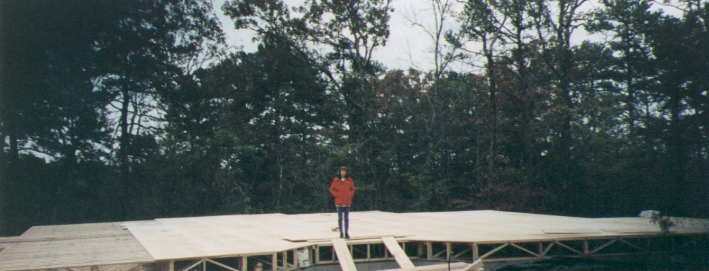
When the subflooring was put down, we were able to walk across the floor and for the first time see what views we would have from all parts of the house. Since the lot slopes, the floor is as much as 10'-20' off the ground. Unless you climb a tree, you can't see the views your house will have until the subflooring is in place. |
To help eliminate potential problems with squeaking floors, we specified that the subflooring be screwed down. The framers used nails at first, then went back and added screws, so we assume that if we had not specified screws, we would not have gotten them. [Update: Our floors still squeak, so they must not have put screws everywhere they were needed. We bought a product by the name of Squeak-No-More to fix the problem. It didn't, but when we had new tile installed during a later renovation, the contractor fixed the squeaks.]
At Judy's house, the builder (Jim Buss) not only conscientiously screwed down all the subflooring, but also used an adhesive between the subfloor and trusses. Judy should not be hearing any squeaks in that house.
[Update: While Judy was still moving in, we noticed a squeak in the floor near the middle of her bedroom. I'm at a loss as to what is causing it and how it could have been prevented. It may be that the subflooring was only screwed down along the edges and the center of a piece of subflooring is what is squeaking.]
In contrast, while Judy's house was being built, I went into another house in our neighborhood which was nearing the end of construction and had a lot of high-end features, but the flooring was not in yet and I could see that the subflooring was just nailed down. This probably means that the sheetrock was only nailed as well. So that house will have lovely wooden floors, but laid on top of squeaking subflooring, and walls with elaborate wood trim, but nails which will be popping up from the sheetrock.
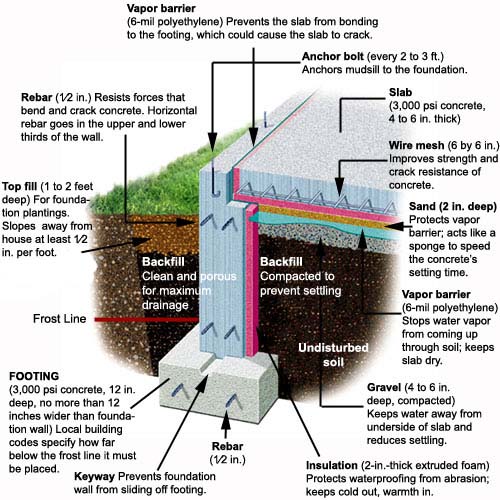
Footers are poured to support a slab, just as for a pier-and-beam foundation. Before pouring the slab, the following steps should be taken:
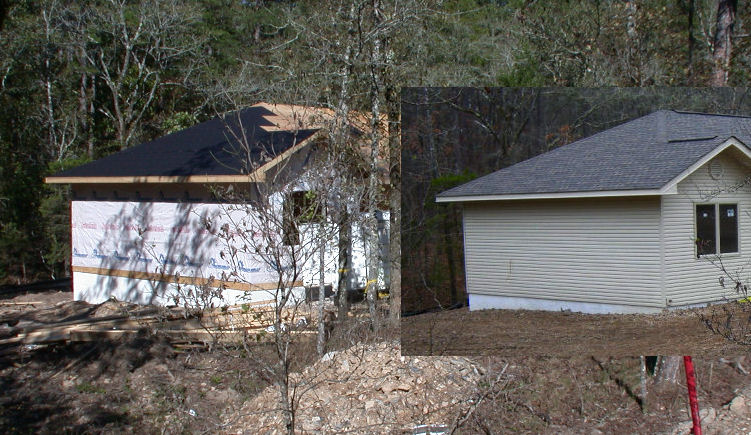
Once the slab has hardened, framing of the walls and roof can begin. A popular option these days is to stain/dye and polish or stamp a pattern on the concrete foundation to use as the finished flooring.
You never want to see big cracks in your concrete slab, but even less so if you are going to have exposed concrete as your finished flooring.
Even with a pier-and-beam foundation, you do not want the concrete weakened to half of its nominal strength or less.
As noted on the page for pouring a concrete driveway, many factors can affect the quality and strength of the concrete. One of the main factors is the temperature when the concrete is poured.
While it is possible to pour concrete in freezing temperature if additional steps are taken to protect it from freezing, as described at the link above, this is definitely something you should discuss with the builder to make sure those steps WILL be taken.
A better alternative would be to wait until around April to begin construction. This gives the builder 7 months or so to get to the point where the driveway and sidewalk(s) should be poured and cured before the first November freeze hits.
On the other end of the calendar -- if you are planning to start building in the Fall, do all you can to get the foundation poured by the first part of November. Don't forget that after you sign a contract with a builder, it will be 2-3 weeks (or longer) before he can get ready to submit applications to the building committee (which only meets twice a month) and get approval for construction. figure on signing that contract no later than the first of October.