City pit is pretty poor stuff. A landscaper will bring in top soil to put on top of it or in holes dug into it if needed. If your builder is going to bring in city pit for leveling, you may want to consult with a landscaper to see if it would be worth the cost of using higher quality soil.
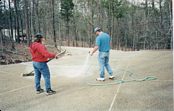
After all the exterior work on the house was completed, the driveway, sidewalks, and front porch were poured. This was an interesting experience for us. We came by when they started and saw them smoothing out plain concrete.
When we came back later, the concrete had smooth stones embedded in it ("exposed aggregate") providing a very attractive surface. We were mystified as to where the stones came from, since we did not see any piles of stones anywhere.
After the rest of the concrete has set up, a water hose is used to wash off the top layer of concrete, which exposes the stone aggregate. This look is probably the most commonly used, at least in our area of HSV.
At Judy's house, the builder said that exposed aggregate on her steep driveway would be slippery when wet, so he used a rough (brushed) finish on the concrete. The steep part of our driveway is not slippery. I noticed that the stones used in Judy's concrete mix were not the attractive kind use in exposed aggregate, so the non-exposed approach may have been cheaper, as well.
And speaking of cost, if you want to get fancy, you can have the concrete dyed and stamped like the front porch and back patio at Judy's house.

|
Because our house is 200' off the street, we were concerned about having enough parking up close to the house. We considered having a pull-in parking area for a couple of cars to the side of the driveway, but we finally decided to have a circular drive come around some trees and in front of the front porch. |
Paving Over Tree Roots:
Not only were we concerned about how this would look, but whether pouring concrete over the roots of the four large trees in the center of the circle would kill the trees.
After being reassured by Craft and others that it would not kill the trees, we decided to go ahead. We hope that the trees survive (not only the concrete, but all the running over by heavy equipment during construction of the house), because they certainly look great in the circle. And more importantly, our house faces West, and without the shade those trees provide, our big windows would be letting in a direct blast of sun which could prove to be unbearably bright and hot.
Update: Two of the four trees in the circle died within two years, but after 9 years, the other trees are still doing fine.
Although the circular drive provides more parking space, it is not wide enough for cars in the middle to get out of once the whole circle is filled with cars, which somewhat defeats the purpose of having extra parking.
So our landscaping plan called for one area to the side of the circle just to be covered with bark and no plants. Two cars can pull off the circle onto the bark and not block the circle. We could have covered that parking area with gravel, but that would have made it stand out more. The bark will blend in with the surrounding area.
Update: Nobody has ever used this unpaved parking area. We would have to be standing outside to guide people into these areas.
The circular drive also lets us have a short sidewalk to the front door, which is nice when you are unloading things from a vehicle. Otherwise, we would have had to curve a sidewalk over from the driveway in front of the garage.
The front porch was a matter of some debate. We would have liked the sidewalk to ramp up to a porch that would have been on the same level as the front door for easy wheelchair accessibility.
Craft kept insisting that we have a couple of stairs from a lower front porch into the house. I finally went to the floor plan software in my computer to see how the porch would look with no steps, and it looked too squat, so once again we went along with Craft's recommendation. It does look good now that it's done, although Kay often wishes we had room for a swing or a bench.
Help stop cracks in driveway:
The following things will improve the quality of a driveway. Be sure to put them in your contract specs to ensure that you get them.
The same things that influence the quality and strength of the concrete in a driveway will, of course, have the same effects on the concrete foundation of a house. This would concern me enough that if I were planning on starting construction of a home in January through March, I would, if at all possible, postpone it until the first of April. This would have the additional benefit that the driveway would probably be poured in the Fall before the first freeze.
Likewise, if it were after August and I was trying to get a house started, I would push hard to get the applications into the building committee no later than the first part of October so that the foundation could be poured by the first part of November before freezes hit.
And note that if it will take 8 months for your house to be complete, the driveway would probably be poured about the 7th month. This means that if you start in July-August, the driveway will come due about January-February, which is the worst possible time.
See this page for how I would specify a driveway today.
Repairing Breaks and Cracks:
A common problem with a driveway is for the corner out by the street to break off. Because this is a common problem, extra steps should be taken to prevent it:
 |
 |
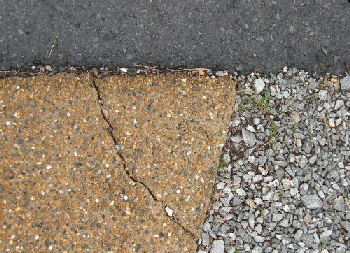
As you can see below, this broken corner had no reinforcement.
And not only was it not thicker than the rest of the driveway,
it was actually LESS thick.

To repair such a break, you will need to drive a 1/2" reinforcing steel driven about 3"-4" deep into a 1/2" pre-drilled hole using a 4 pound or heavier hammer. A hammer drill may be needed to drill the hole. Drill the hole in the center of the old concrete The pin will last longer if you paint it first with a good metal primer.
Make sure that the ground where the patch will be poured is properly prepared and is damp, and that the pin sticks well into the area to be poured. After pouring the new concrete, cover it with plastic and douse the patch with water after it becomes stiff and for 3-7 days thereafter. As said elsewhere, don't patch in freezing weather. If it is hot and sunny, shade the patch and protect it from drying wind. And don't forget to barricade the patch so that nothing disturbs it for a minimum of 7 days.
Other cracks in the driveway can be repaired with materials available from home centers like Lowes.
In 2015, we hired a fellow to repair cracks in our driveway and to "mudjack" sections which has sunk into the ground. Mudjacking consists of drilling holes (3" or so) through the concrete and using a large hose to pump concrete under the section. Before pumping, holes can be dug at the sides of the section and large jacks put under the slab to jack it up to where it is level again. This makes it easier to get the concrete under the slab.
Cracks are normally made uniform with a saw and blown out with compressed air. It may be difficult to get the material used to fill cracks to match the color of the rest of the concrete. There are materials which comes clear and can be made to match using colored powder such as is used in dyed concrete, but the fellow doing our job didn't know about that. Since filling the cracks is largely cosmetic, it defeats the purpose (and thus wastes money) to fill them with material that makes the stand out even more.
It costs about $1200 to have 4 sections of the driveway leveled plus having cracks repaired across about a half-dozen sections (which included cracks in the sunken sections).
We got a bid on having on having the cracked/sunken sections jack hammered out and repoured. It would have been about $5500 and the color of the replaced sections probably wouldn't have matched the old sections.